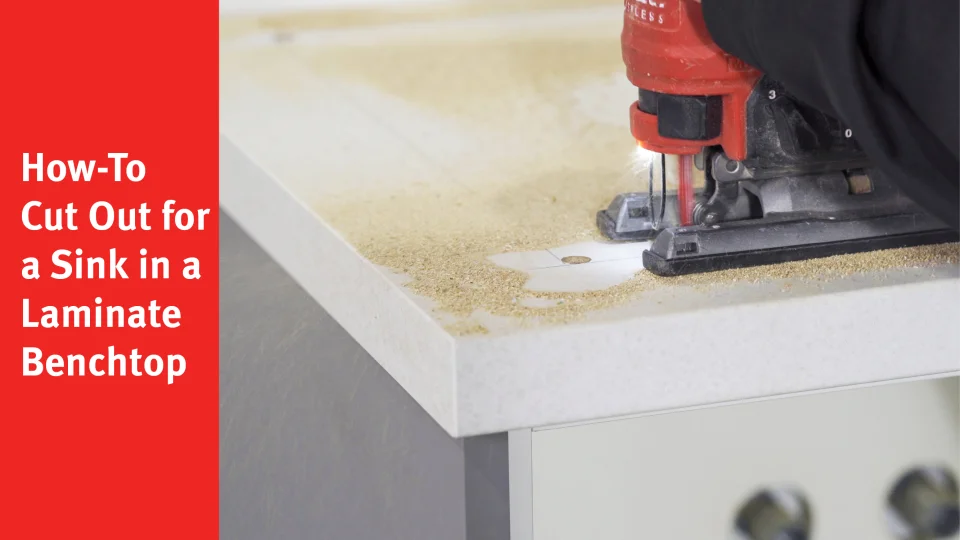
Are you ready to give your kitchen a fresh new look? Cutting out a hole for your kitchen sink might sound tricky, but with the right steps, you can do it yourself and save money.
Imagine having a perfectly fitted sink that matches your countertop just right. In this guide, you’ll discover simple, clear instructions that make the process easier than you think. Stick with me, and by the end, you’ll have the confidence to tackle this project on your own—and enjoy the satisfaction of a job well done.
Let’s get started!
Tools And Materials Needed
Cutting out a hole for a kitchen sink requires the right tools and materials. Having everything prepared makes the job easier and safer. Using proper equipment helps you cut cleanly and avoid mistakes. Gather all needed items before you start the work.
Essential Cutting Tools
- Jigsaw with a fine-tooth blade for smooth cuts
- Drill to create starter holes for the jigsaw blade
- Measuring tape for accurate dimensions
- Pencil or marker to trace the cutting line
- Clamps to secure the countertop while cutting
Measuring Instruments
- Steel ruler for precise straight lines
- Square tool to check right angles
- Template or pattern from the sink manufacturer
- Level to ensure the sink sits evenly
Safety Gear
- Safety goggles to protect your eyes from debris
- Dust mask to avoid inhaling dust particles
- Ear protection to reduce noise from power tools
- Work gloves for hand protection and better grip

Credit: www.amazon.com
Preparing The Work Area
Preparing the work area is crucial before cutting out a hole for your kitchen sink. Taking time to organize your space can save you from costly mistakes and damage. It also helps you stay focused and efficient throughout the process.
Clear The Countertop
Remove everything from the countertop to create a clean workspace. This includes small appliances, utensils, and decorative items. Leaving the area clear gives you room to work freely and prevents anything from getting damaged or dirty.
Think about how a cluttered space affects your concentration. Have you ever tried to work on a project only to be distracted by scattered objects? Clearing the countertop ensures you won’t have that problem while cutting your sink hole.
Protect Surrounding Surfaces
Cover adjacent surfaces with painter’s tape or plastic sheets to shield them from scratches and dust. The edges of your countertop, cabinets, and floors are vulnerable during this kind of work. Protecting them upfront avoids expensive repairs later.
Use drop cloths or old towels on the floor to catch debris. If your countertop material is delicate, place a soft barrier underneath your tools. These small precautions can prevent frustrating damage and keep your kitchen looking great.
Measuring And Marking The Sink Hole
Measuring and marking the sink hole is a vital step before cutting into your countertop. Precise measurements prevent mistakes and ensure a perfect fit for your kitchen sink. Take your time to measure carefully and mark clearly. Clear markings guide your cutting and keep the project on track.
Determine Sink Dimensions
Start by checking the sink’s specifications. Look for the sink’s width, length, and depth. Note any extra space needed for mounting or sealing. Measure the outer edges and the cutout size recommended by the manufacturer. Double-check all numbers to avoid errors.
Mark The Cut Lines
Place the sink upside down on the countertop. Use a pencil to trace around the sink’s edge. Mark the cutout lines inside the trace, following the sink’s cutout dimensions. Use a straightedge or ruler to keep lines straight. Add reference marks for faucet holes or accessories. Make sure all marks are visible and clear before cutting.

Credit: www.youtube.com
Drilling Starter Holes
Drilling starter holes is an essential part of cutting out the hole for your kitchen sink. These holes provide a guide for your saw blade and make the cutting process easier and cleaner. Without starter holes, it can be hard to insert the saw blade and you risk damaging your countertop.
Use caution and precision while drilling. A small mistake can cause cracks or chips in the countertop. Take your time to ensure the holes are in the right spots and of the correct size. Proper preparation here will help the rest of your project go smoothly.
Choose Drill Bit Size
Select a drill bit that matches the size of your saw blade or slightly larger. This size allows the blade to fit easily into the hole without wobbling. For most kitchen sinks, a drill bit between 1/2 inch and 3/4 inch works well.
Using the right size bit prevents damage to the countertop edges. It also helps keep the cut line neat and straight. Avoid bits that are too small, as the blade may not fit. Bits that are too large can weaken the surrounding material.
Position And Drill Carefully
Mark the corners of the sink cutout clearly before drilling. Place the drill bit tip exactly at the corner mark. Drill straight down slowly to avoid slipping or cracking.
Keep the drill steady and maintain firm pressure. Stop drilling once the bit passes through the countertop. Repeat this for each corner of the sink outline. These holes will serve as entry points for your jigsaw blade.
Double-check the hole placement before you start cutting. Accurate holes help create a smooth, precise sink opening. Take your time and focus on accuracy to avoid costly mistakes.
Cutting The Hole
Cutting the hole for a kitchen sink requires careful measuring and marking. Use a jigsaw to follow the outline smoothly and avoid damaging the countertop. Take time to check fit before finalizing the cut.
Cutting the hole for a kitchen sink requires precision and patience. It can seem daunting, but with the right tools, it’s manageable. This section will guide you through the process with clear instructions. Let’s dive into the details to ensure a perfect fit for your sink.Using A Jigsaw Correctly
A jigsaw is ideal for cutting curves and corners. Start by marking the sink’s outline on your countertop. Use a pencil for clear, visible lines. Secure the countertop to prevent movement while cutting. Fit the jigsaw with a fine-toothed blade. This ensures a clean cut without splintering. Begin cutting at a corner of the marked outline. Follow the line steadily, letting the saw do the work. Use both hands to guide the jigsaw smoothly. Avoid forcing the blade through the material. This prevents damage and ensures a clean edge.Maintaining Control And Accuracy
Maintaining control is crucial for a precise cut. Keep a firm grip on the jigsaw at all times. This helps keep the blade steady and on track. Check that the jigsaw’s base plate is flat on the surface. This minimizes vibration and enhances control. Pause occasionally to check your progress against the outline. Make adjustments as needed to stay on course. Use clamps to hold the countertop securely. This prevents unwanted movement during the cut. If the jigsaw begins to veer off, stop and realign. Patience and accuracy yield the best results.
Credit: www.angi.com
Smoothing And Finishing The Edges
Smoothing and finishing the edges of your kitchen sink cutout is key to a clean, professional look. Rough edges can cause damage or wear over time. Proper finishing also helps protect the countertop material from moisture and stains. Take your time to make sure every edge is smooth and sealed well.
Sanding The Cut Edges
Start by sanding the cut edges with medium-grit sandpaper. This removes any splinters or rough spots left by the saw. Move the sandpaper evenly around the entire cutout. After the initial sanding, switch to fine-grit sandpaper for a smoother finish. Sand in small circles to avoid uneven surfaces. Wipe away dust with a damp cloth to check your progress.
Sealing The Surface
Sealing the edges protects them from water damage and staining. Choose a sealant that matches your countertop material, such as silicone or epoxy. Apply a thin, even layer along all cut edges with a small brush. Allow the sealant to dry completely before using the sink area. This step extends the life of your countertop and keeps it looking new.
Installing The Kitchen Sink
Installing the kitchen sink is a key part of your kitchen makeover. It needs care to fit it well and avoid leaks. A properly installed sink makes your kitchen safe and functional.
Fitting The Sink Into The Hole
Place the sink gently into the cutout hole. Check that it fits evenly on all sides. Adjust it slightly to align with the countertop edges. Make sure the sink sits flat without rocking. This step prevents water from dripping under the sink.
Securing And Sealing The Sink
Secure the sink using clips or brackets under the countertop. Tighten these evenly to hold the sink firmly in place. Use a silicone sealant around the sink edge for a water-tight seal. Smooth the sealant with a finger or tool to fill all gaps. This protects your cabinets from water damage and keeps the sink stable.
Common Mistakes To Avoid
Cutting the hole too large or uneven can cause leaks and weak support. Ignoring measurements often leads to costly mistakes and wasted materials. Always double-check the size before cutting to avoid damage.
Cutting out a hole for a kitchen sink can seem straightforward, but it’s easy to make mistakes that can lead to costly repairs or replacements. To ensure a smooth installation, it’s crucial to be aware of common pitfalls. This section highlights the errors you should avoid to ensure your project is a success.Incorrect Measurements
Accurate measurements are the foundation of a perfect sink cutout. A slight miscalculation can result in a hole that is too large or small, causing fitting issues. Always double-check your dimensions before making any cuts. Consider using a template provided by the sink manufacturer to guide your measurements.Rushing The Cutting Process
Patience is key when cutting the hole for your kitchen sink. Rushing this step can lead to jagged edges or an uneven cut, affecting the sink’s fit and appearance. Use a steady hand and take your time with each cut. Ensure your tools are sharp and appropriate for the material to achieve clean, precise cuts. By being mindful of these common mistakes, you can avoid unnecessary headaches and ensure a smooth and successful sink installation. Have you ever rushed a project and wished you hadn’t? Taking the time to do it right pays off in the end.Tips For Different Countertop Materials
Cutting out a hole for your kitchen sink varies greatly depending on the countertop material you have. Each type demands a unique approach and tools to avoid damage. Understanding these differences helps you achieve a clean cut and save time and money.
Cutting Laminate Countertops
Laminate countertops are delicate around the edges, so you need to be gentle to prevent chipping. Use a fine-toothed saw blade, such as a carbide-tipped blade on a jigsaw or circular saw, to get a smooth cut.
Start by drilling a pilot hole inside the cut line to insert your saw blade easily. Always cut from the underside if possible, since laminate tends to chip on the top surface. Applying painter’s tape along the cut line also helps reduce splintering.
One time, I underestimated the fragility of laminate and ended up with jagged edges that required extra sanding. That taught me to go slow and steady, which made a noticeable difference in the final look.
Working With Granite Or Stone
Granite and stone countertops need specialized equipment and extra caution. A diamond-tipped blade and a wet saw are essential to keep the stone cool and prevent cracking.
Mark your cut carefully with a grease pencil and double-check measurements before starting. Keep the saw moving steadily, but don’t rush. Water flow during cutting is crucial; it reduces dust and cools the blade, extending its life.
Have you considered renting a wet saw rather than buying one? It’s a budget-friendly option if you’re working on a one-time project. Also, wearing safety gear is non-negotiable—stone dust can be hazardous.
Frequently Asked Questions
How Do I Measure For A Kitchen Sink Hole?
Measure your sink’s dimensions carefully. Mark the outline on the countertop using a pencil and tape. Double-check measurements before cutting.
What Tools Are Needed To Cut A Sink Hole?
You need a jigsaw, drill with a hole saw bit, measuring tape, pencil, and safety gear like goggles and gloves.
How To Prevent Countertop Damage When Cutting?
Use painter’s tape on the cut area to reduce chipping. Cut slowly and steadily with the jigsaw for clean edges.
Can I Cut A Hole For Any Sink Type?
Yes, but ensure the hole matches the sink’s size and shape. Check manufacturer instructions for specific cutout details.
Conclusion
Cutting out a hole for your kitchen sink is easier than it seems. Follow the steps carefully and take your time. Measure twice, cut once to avoid mistakes. Use the right tools for a clean, smooth cut. Safety matters—always wear protective gear.
With patience and care, you can complete this task yourself. Your kitchen will look neat and ready for use. Practice makes perfect, so don’t rush. Soon, you’ll enjoy the satisfaction of a job well done.


