Are you ready to upgrade your kitchen but unsure how to cut out the sink space in your countertop? This task might seem tricky at first, but with the right steps, you can do it yourself and save time and money.
Imagine fitting your sink perfectly without waiting for a professional. In this guide, you’ll learn simple, clear instructions that anyone can follow. By the end, you’ll have the confidence to handle this project smoothly and achieve a clean, professional-looking result.
Keep reading—you’re just a few steps away from transforming your kitchen!
Tools And Materials Needed
Cutting out a kitchen sink in a countertop requires the right tools and materials. Preparing everything beforehand makes the process smooth and safe. Using proper equipment ensures precise cuts and protects your countertop from damage.
Gathering all necessary items helps avoid interruptions. It saves time and keeps your workspace organized. Below are the essential tools and materials for this task.
Measuring And Marking Tools
- Tape measure – for accurate sink dimensions
- Pencil or marker – to mark cut lines
- Straight edge or ruler – to draw straight lines
- Masking tape – to protect the countertop surface
Cutting Tools
- Jigsaw – ideal for cutting curves and shapes
- Drill with a hole saw bit – to start the cut
- Reciprocating saw (optional) – for thick or hard countertops
- Clamps – to secure the countertop during cutting
Safety Equipment
- Safety glasses – protect eyes from debris
- Dust mask – prevents inhaling dust particles
- Ear protection – reduces noise from power tools
- Work gloves – protects hands from sharp edges
Finishing And Cleanup Materials
- Sandpaper or sanding block – smooth rough edges
- Vacuum or brush – remove dust and debris
- Sealant or silicone caulk – to seal around the sink
- Cleaning cloth – wipe the surface after cutting

Credit: www.fordtransitusaforum.com
Measure And Mark The Sink Area
Measuring and marking the sink area is the foundation of a successful countertop cut. Without precise measurements, the sink may not fit properly, leading to leaks or an uneven finish. Taking your time to get this right saves you from costly mistakes and frustration later on.
Determine Sink Size
Start by checking the exact dimensions of your sink. Look for the manufacturer’s template if available; this often includes the recommended cutout size. If you don’t have a template, measure the sink’s rim width, length, and width carefully.
Remember to account for any mounting hardware or clips that require extra space. Ask yourself: does the sink have an overmount or undermount design? This affects how much space you’ll need to leave around the edges.
Mark Cut Lines On Countertop
Place the sink or its template upside down on the countertop where you want it installed. Use a pencil to trace the outline clearly. Double-check the position to ensure it’s centered and aligned with other fixtures like faucets or appliances.
Use a straightedge or ruler to refine your lines, making sure they are sharp and precise. If your sink requires a gap for mounting clips, mark those areas too. Can you visualize how the sink will sit once cut? Accurate marking helps you avoid surprises once you start cutting.
Prepare The Workspace
Preparing your workspace is key to a smooth and safe kitchen sink cutout. It sets the tone for the entire project and helps avoid unnecessary accidents or damage. Taking a bit of extra time here can save you from costly mistakes later on.
Clear The Countertop
Start by removing everything from your countertop. This includes small appliances, utensils, and any decorative items. A clear surface gives you space to work freely and reduces the chance of knocking things over.
Make sure to also clear out the cabinets below the sink area. You’ll need easy access to tools and plenty of room to maneuver. Don’t underestimate how cramped it can feel without this step—it’s worth the effort to clear the space fully.
Protect Surrounding Surfaces
Protecting your countertops and nearby walls is crucial. Use painter’s tape around the cut lines to prevent chipping. You can also lay down drop cloths or old towels to catch dust and debris.
Think about the tools you’ll use—some create a lot of dust or vibrations. Have you considered how you’ll keep your floor clean? Adding cardboard or plastic sheets below your workspace can make cleanup much easier.
Drill Starter Holes
Drilling starter holes is a crucial step in cutting out a kitchen sink from your countertop. These holes give your jigsaw blade a perfect entry point, helping you make clean and precise cuts without damaging the surface. Without properly drilled starter holes, your cutting process can become frustrating and uneven.
Choosing The Right Drill Bit
Pick a drill bit that matches the size of your jigsaw blade. Usually, a 3/8-inch or 1/2-inch bit works well to create enough space for the blade to fit through. If the hole is too small, you’ll struggle to insert the blade; too large, and you risk weakening the countertop around the cut.
Marking The Hole Locations
Before drilling, mark the exact spots where you want the starter holes. These should be just inside the sink outline, close to the corners or curves where the jigsaw blade needs to turn. Accurate marks keep your cut smooth and reduce the chance of mistakes.
Drilling Safely And Effectively
Place a scrap piece of wood under the countertop to prevent splintering as you drill. Hold your drill steady and start at a slow speed to avoid cracking the surface. Wear safety goggles and keep your hands clear—safety matters as much as precision here.
Tips For Handling Tough Materials
Countertops made of granite or quartz need special drill bits, like diamond-tipped ones. Use water to cool the drill bit and reduce dust, which protects both the material and your tools. If the material feels too hard, consider getting advice from a professional rather than forcing the drill.
Cut The Countertop
Cutting the countertop for your kitchen sink is a task that demands precision and care. A clean, accurate cut not only ensures the sink fits perfectly but also helps avoid damage to your countertop. Taking your time and following the right techniques can make this part of the project smoother and more satisfying.
Use The Jigsaw Properly
Before you start cutting, make sure your jigsaw blade is sharp and suitable for the material of your countertop. A blade designed for laminate or wood works best on most kitchen surfaces.
Hold the jigsaw firmly and guide it steadily along your cut line. Avoid pushing too hard; let the blade do the work to prevent chipping or splintering.
If you’re cutting a thick countertop, consider drilling starter holes at the corners of your marked area. This makes it easier to insert the jigsaw blade and start cutting cleanly.
Follow The Marked Lines
Accurate marking is crucial. Use a straightedge or template to draw clear, visible lines where the sink will be installed.
As you cut, keep your eyes on these lines. It’s tempting to rush, but staying focused ensures your cut stays true to the shape and size needed.
If your countertop material is prone to chipping, you can place painter’s tape over the cutting line. This helps minimize damage along the edges.
Smooth The Cut Edges
Smooth the cut edges using sandpaper or a file to prevent roughness. This step ensures a clean, safe finish around the sink opening. Take your time for a neat and polished countertop look.
Cutting out a kitchen sink in a countertop is a task that requires precision, and once you’ve made the cut, it’s crucial to ensure the edges are smooth. A smooth edge not only enhances the appearance but also ensures safety and prevents any material from chipping or splintering. This final touch can make all the difference in your DIY project, transforming it from amateur to professional.
Sand The Edges
After cutting the countertop, grab some sandpaper. Opt for medium-grit to start, as it effectively removes rough spots without being too abrasive. Gently sand along the cut edges, applying even pressure to create a uniform finish. Once you’ve achieved a smoother edge, switch to a fine-grit sandpaper. This will polish the surface, removing any finer imperfections and giving it a sleek touch. If you have access to a sanding block or a power sander, these tools can save time and effort.
Clean The Surface
After sanding, it’s important to clean up the area. Dust and debris can settle on the countertop, potentially getting in the way of a perfect installation. Use a damp cloth to wipe down the surface, ensuring you remove all particles. Dry the area thoroughly with a clean towel. This step is crucial, especially if you’re planning to seal the edges, as moisture can interfere with adhesive bonding. A spotless surface not only looks better but also ensures the longevity of your countertop. Have you ever noticed how a well-executed DIY project gives you a sense of accomplishment? Taking the time to smooth and clean the edges can elevate your kitchen’s look and increase your pride in your handiwork. So, what’s stopping you from turning your kitchen renovation dreams into reality?
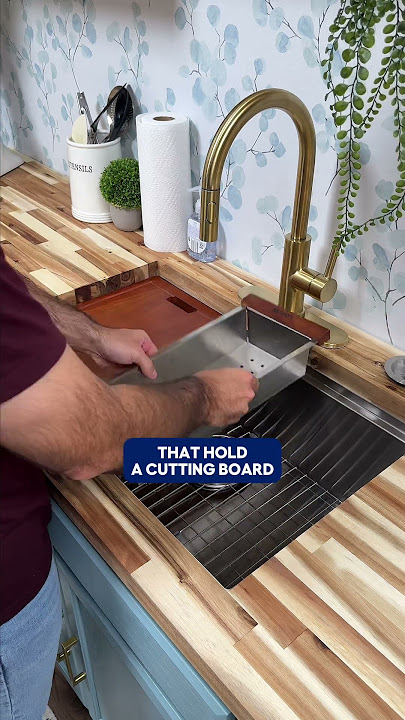
Install The Sink
Measure and mark the sink area on the countertop carefully. Use a jigsaw to cut along the marked lines for a precise fit. Secure the sink into the cutout and seal the edges to prevent leaks.
Installing your kitchen sink is a pivotal step in your countertop project. This task requires precision, but with the right guidance, you can achieve a seamless fit. A well-installed sink not only adds functionality but also elevates the overall look of your kitchen.
Apply Sealant
Before placing your sink, it’s crucial to create a watertight seal. Apply a generous bead of silicone sealant around the edge of the sink cutout. This prevents water from seeping into the gaps and causing damage. Make sure the sealant is evenly distributed. You don’t want any weak points where water could find its way in. Take your time with this step; a well-applied sealant will save you from headaches later.
Place And Secure The Sink
Carefully lower the sink into the cutout, ensuring it fits snugly within the space. It’s helpful to have someone assist you to avoid any mishaps. Once in place, press down firmly to secure the sink against the sealant. Next, fasten the sink clips underneath the countertop. These clips hold the sink in position and ensure it stays tight against the counter. Tighten each clip gradually, alternating sides to maintain an even pressure. Is your sink stable and secure? Give it a little wiggle to test. If it moves, check the clips again. A securely placed sink is a cornerstone of a functional kitchen.

Credit: stonecountertops.co.za
Final Checks And Cleanup
After cutting out the kitchen sink space in your countertop, the final checks and cleanup are crucial to ensure a smooth, functional, and clean installation. This stage might seem simple, but overlooking details can lead to leaks, misalignment, or damage to your beautiful new workspace. Taking a few extra minutes here can save you from headaches later on.
Inspect The Installation
Carefully check the edges of your cutout to make sure they are smooth and even. Uneven cuts can cause your sink to sit improperly, leading to water pooling or sealant failure.
Look under the countertop and verify that the sink fits snugly without gaps. If you notice any spaces, you might need to add or adjust the sealant to prevent water damage.
Test the sink’s alignment by placing it in the cutout and gently pressing down. Does it sit flush? Are there any wobbles or uneven spots? If something feels off, it’s worth addressing before moving on.
Clean The Workspace
Remove all debris, sawdust, and leftover materials around your countertop and under the sink. A clean workspace helps you spot potential issues and prevents dirt from interfering with sealants or adhesives.
Wipe down the edges of the cutout with a damp cloth to clear away fine dust. This step helps the sealant stick better and ensures a neat finish.
Don’t forget to check your tools and clean them as well. Keeping your equipment in good shape will make your next project easier and more enjoyable.
Credit: thevansmith.com
Frequently Asked Questions
How Do I Measure For A Kitchen Sink Cutout?
Measure the sink’s outer edges and mark these on the countertop. Allow extra space for mounting clips and sealing. Double-check measurements before cutting to ensure a perfect fit and avoid costly mistakes.
What Tools Are Needed To Cut A Kitchen Sink Hole?
You need a drill, jigsaw, measuring tape, pencil, and safety gear. A hole saw attachment helps start the cut. These tools ensure a clean, precise cut for your kitchen sink installation.
How Do I Prevent Countertop Damage When Cutting?
Use painter’s tape on the cutting area to protect surfaces. Drill starter holes carefully to avoid cracking. Cut slowly and steadily to maintain control and prevent chipping or splintering.
Can I Cut A Sink Hole In Any Countertop Material?
Most materials like laminate, wood, and solid surface counters can be cut. Stone or granite requires professional tools and skills. Always check your countertop type before attempting to cut.
Conclusion
Cutting out a kitchen sink in your countertop can be simple. Follow the steps carefully and take your time. Use the right tools for clean and safe cuts. Measure twice to avoid mistakes and save materials. Stay patient and focused throughout the process.
This project can improve your kitchen’s look and function. A well-cut sink opening fits perfectly and looks neat. Enjoy the satisfaction of doing the work yourself. Your kitchen will feel fresh and updated after this task.