


If you own a KitchenAid stand mixer, you know how powerful and reliable it can be for all your baking and cooking needs. But sometimes, your mixer might not work as smoothly as it should.
Maybe the attachments don’t fit right, or the mixing isn’t as even as before. The good news? You can fix this yourself by adjusting your KitchenAid stand mixer. In this guide, you’ll learn simple, step-by-step tips to get your mixer running perfectly again.
Keep reading to make sure your mixer helps you create your best recipes every time.
Mixer Components To Check
Before you start adjusting your KitchenAid stand mixer, it’s important to get familiar with the key components that affect its performance. Knowing which parts to check can save you time and prevent damage. Understanding your mixer’s anatomy helps you pinpoint issues faster and make precise adjustments.
Identifying Key Parts
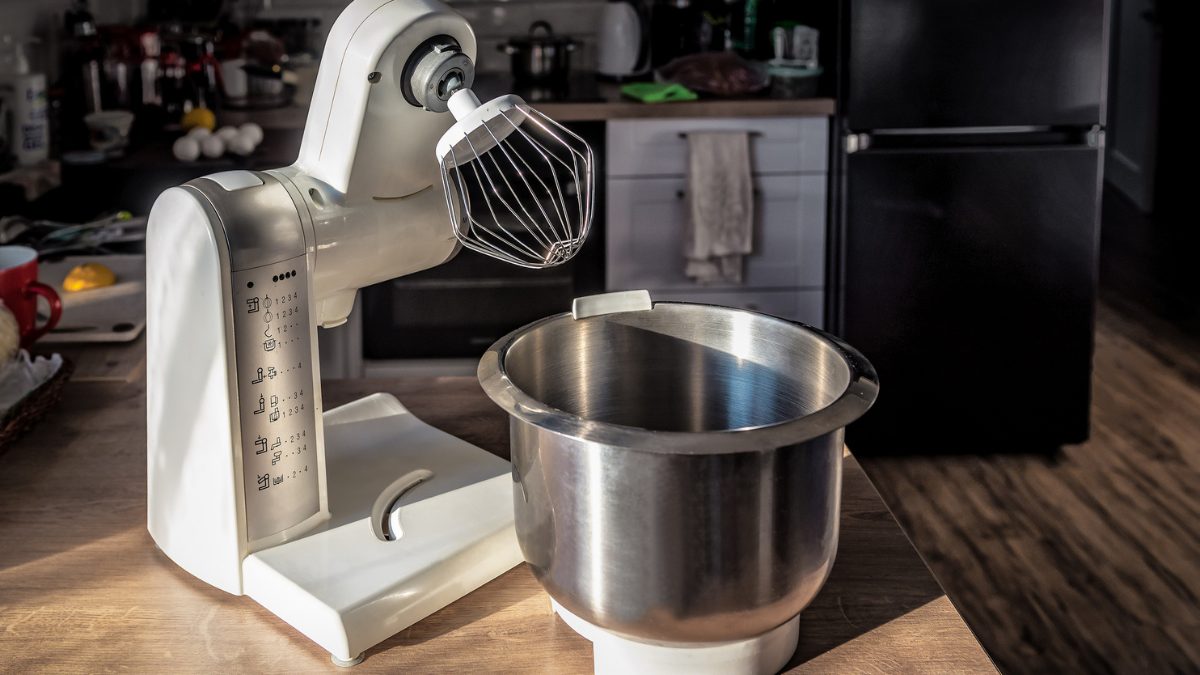
Your KitchenAid mixer has several important parts that you need to recognize. The mixing bowlholds your ingredients and locks securely into the base. The beater attachment, whether it’s a paddle, whisk, or dough hook, connects to the mixer head and does the actual mixing.
Don’t overlook the tilt-head or bowl-lift mechanism, which allows you to access the bowl and attachments easily. The speed control leveradjusts how fast the attachments spin, affecting your recipe’s outcome. Finally, check the locking knobthat keeps the head in place during operation.
Common Adjustment Points
Focus first on the attachment hub—if the beater wobbles or doesn’t spin correctly, this area might need tightening or cleaning. Check the beaters themselvesfor signs of wear or damage that could throw off your mixer’s balance.
Another adjustment point is the belt inside the mixer. If your mixer is struggling or making odd noises, the belt might be loose or worn out. You may need to open the mixer housing to inspect it carefully.
Have you noticed your mixer head is loose or tilting during use? The locking lever or knobcould need tightening. A secure head ensures consistent mixing without interruptions.
Which part of your mixer have you checked most recently? Spending a few minutes inspecting these components regularly can keep your KitchenAid running smoothly and extend its lifespan.

Credit: www.amazon.com
Tools Needed For Adjustment
Adjusting your KitchenAid stand mixer might seem tricky at first, but having the right tools makes the job much easier. Using the proper equipment ensures you won’t damage any parts or waste time guessing. Before you start, take a moment to gather everything you need for a smooth adjustment process.
Essential Tools List
- Flathead screwdriver:This helps loosen or tighten screws on the mixer’s head and attachments.
- Hex wrench (Allen key):Often required for adjusting internal components or securing certain bolts.
- Soft cloth:Use it to protect the mixer’s surface from scratches during adjustments.
- Measuring tape or ruler:Helps ensure precise alignment of parts.
- Small flashlight:A handy tool to see inside tight spaces or dark areas within the mixer.
Having these tools ready means you won’t interrupt your workflow searching for them mid-task. I once tried adjusting my mixer without a hex wrench and ended up forcing parts, which caused unnecessary wear. Don’t make the same mistake—prepare your toolkit first.
Optional Accessories
- Lubricant or food-safe grease:Useful if the mixer’s moving parts feel stiff or squeaky after adjustment.
- Magnifying glass:Helps inspect small screws or parts closely for damage or wear.
- Cleaning brush:Keeps dust and debris out of internal components during maintenance.
- Owner’s manual or adjustment guide:Having the official instructions on hand can clarify tricky steps.
These extras aren’t mandatory but can make the process smoother and extend your mixer’s lifespan. Have you ever skipped small steps only to regret it later? Sometimes a little extra care upfront saves big headaches down the line.
Adjusting The Beater Height
Adjusting the beater height ensures proper mixing and prevents damage to your stand mixer. Turn the adjustment screw to raise or lower the beater for the best fit. This simple step improves mixing results and protects your appliance.
Adjusting the beater height of your Kitchenaid Stand Mixer is a crucial task that ensures your ingredients are mixed evenly and efficiently. If you’ve noticed your mixer leaving unmixed flour at the bottom of the bowl or making a clinking noise, it might be time to check and adjust the beater height. Getting this right makes a world of difference in your baking results, ensuring a smoother, more consistent batter or dough.
When To Adjust
You may need to adjust the beater height if your mixer isn’t reaching all parts of the bowl. If you see flour or other ingredients left untouched after mixing, it’s a clear sign. Additionally, if the beater is hitting the bottom of the bowl, it’s time for an adjustment.
Step-by-step Process
- Turn Off and Unplug: Safety first! Make sure your mixer is off and unplugged before making any adjustments.
- Remove the Bowl and Beater: Take off the bowl and remove the beater attachment for easy access.
- Locate the Adjustment Screw: Find the small screw located at the hinge where the head of the mixer pivots. This screw controls the beater height.
- Adjust the Screw: Use a flathead screwdriver to turn the screw. Turn it clockwise to raise the beater or counterclockwise to lower it.
- Test the Height: Reattach the beater and bowl. Turn the mixer on to a low speed to test if the beater reaches all parts of the bowl without scraping the bottom.
- Fine-Tune if Necessary: If the height still seems off, make small adjustments and test again until satisfied.
Have you ever wondered why small adjustments can have such a big impact? In baking, precision is key, and a well-adjusted mixer can help you achieve that perfect consistency every time. So, take a moment to fine-tune your beater height and elevate your mixing game.

Credit: www.cakesandmore.in
Fixing Attachment Fit Issues
Attachment fit issues can be frustrating, especially when you’re eager to start mixing. A loose or misaligned attachment not only slows down your work but can also damage your KitchenAid stand mixer. Fixing these fit problems quickly ensures your mixer performs smoothly and lasts longer.
Checking Attachment Alignment
First, check if the attachment lines up correctly with the mixer’s hub. The attachment should slide in without force and sit flush against the hub’s surface. If it feels off or wobbly, try rotating it slightly until the pins or slots match perfectly.
Sometimes, dried batter or debris can block the connection points. Take a moment to clean both the attachment and the hub with a damp cloth before trying again. Have you noticed your attachments sticking more after heavy use? Cleaning might be the simple fix you need.
Securing Attachments Properly
Once aligned, you need to secure the attachment firmly. Turn the attachment’s locking knob or lever until it clicks or feels tight. Avoid overtightening, which can strain the mechanism, but don’t leave it loose either.
If the attachment still feels insecure, inspect the locking mechanism for any damage or wear. Sometimes, small parts inside the locking system can break or get worn down, causing poor fit. Have you ever had to replace a part to restore a secure attachment fit?
Tightening Loose Parts
Loose parts on your KitchenAid stand mixer can cause noise, reduced performance, or even damage over time. Tightening these parts not only improves the mixer’s efficiency but also extends its lifespan. Let’s look at how to identify and safely tighten those loose components to keep your mixer running smoothly.
Identifying Loose Components
Start by giving your mixer a quick visual and physical check. Focus on areas like the attachment hub, beater shaft, and tilt-head hinge. These are common spots where looseness can develop after frequent use.
Listen carefully as you run the mixer without ingredients. Any unusual rattling or wobbling often points to loose parts. Have you ever noticed a slight wobble in your mixer’s head or attachments during operation? That’s a clear sign to inspect those components closely.
Don’t forget to check the bowl locking mechanism too. If the bowl moves or shifts easily, it may need tightening or realignment to stay secure during mixing.
Safe Tightening Techniques
Before you start tightening, always unplug the mixer to avoid accidents. Use the right tools—typically a screwdriver or an Allen wrench, depending on your model. Trying to force parts without the correct tool can cause damage.
Tighten screws and bolts gradually, turning them just enough to remove play but not so much that you strip the threads. Over-tightening can cause cracks or make future adjustments difficult. Feel the resistance as you tighten and stop when it’s firm but comfortable.
If you’re dealing with the tilt-head hinge, add a drop of food-safe lubricant after tightening to keep movement smooth. This small step can prevent future loosening and reduce wear.
- Double-check all tightened parts by gently shaking or moving them.
- Test the mixer on a low speed to confirm everything feels stable.
- Keep a maintenance log to track when you last tightened or serviced your mixer.
Have you ever skipped tightening small parts only to find your mixer acting up later? Taking a few minutes to secure loose components can save you from costly repairs down the road.
;)
Credit: www.cookist.com
Maintaining Optimal Performance
Keeping your KitchenAid stand mixer in top shape ensures smooth mixing and longer machine life. Regular maintenance helps avoid common problems like motor strain or uneven mixing. Simple care routines keep all parts working well and prevent damage over time.
Regular Cleaning Tips
Clean your mixer after each use to remove food residue. Wipe the exterior with a damp cloth and mild soap. Avoid harsh chemicals that may damage the finish.
Remove and wash attachments separately with warm, soapy water. Dry them completely before storing to stop rust or mold growth.
Check the bowl and beater for stuck ingredients. Clean these parts carefully to maintain hygiene and performance.
Lubrication And Care
Some mixer models need occasional lubrication for smooth gear movement. Use food-safe lubricant if recommended in your user manual.
Avoid over-lubricating, which can attract dust and cause buildup. Apply just a small amount to the moving parts.
Inspect the mixer’s motor and gears regularly for wear. Address any unusual noises or resistance early to prevent bigger issues.
Troubleshooting Common Problems
Running into problems with your KitchenAid stand mixer can be frustrating, especially when you’re in the middle of baking. Knowing how to troubleshoot common issues helps you get back to mixing quickly without unnecessary stress. Let’s look at some frequent problems and practical ways to fix them, so your mixer performs smoothly every time.
Mixer Not Mixing Evenly
If your mixer seems to leave some ingredients untouched or lumps appear, the beaters might not be aligned properly. Check if the attachment is securely locked into place and fits snugly without wobbling.
Sometimes the bowl height adjustment is off. Your mixer should have the bowl slightly tilted so the beater scrapes the sides well. Try adjusting the bowl lift lever or knob until you see the beater gently touch the bowl’s sides without dragging.
Have you noticed the beater speed feels inconsistent? This could mean the speed control switch needs cleaning or the internal gears require lubrication. Try running the mixer empty at low speed to see if the motion feels smooth, then gradually increase speed.
Unusual Noises And Vibrations
Strange sounds like grinding or rattling often indicate something is loose inside your mixer. First, unplug it and inspect the attachments and bowl to ensure nothing is stuck or improperly secured.
If the noise persists, check the mixer’s base for any debris or spills that might cause imbalance. Sometimes, simply cleaning the base and re-leveling the mixer on a flat surface reduces vibration significantly.
Have you ever felt your mixer shaking more than usual? This might mean the gears inside are worn or the motor is struggling. If you’ve already tried cleaning and adjusting, it may be time to consult a professional or contact KitchenAid support.
Frequently Asked Questions
How Do I Adjust The Tilt Head On A Kitchenaid Mixer?
To adjust the tilt head, unlock the lever on the mixer’s side. Then, lift the head gently until it locks in the raised position. This allows you to attach or remove mixing bowls and accessories easily.
What Speed Settings Should I Use After Adjusting?
Start mixing on a low speed to avoid splashing. Gradually increase speed based on your recipe needs. Proper speed adjustment ensures efficient mixing and protects the motor.
How Do I Tighten A Loose Kitchenaid Mixer Bowl?
Twist the bowl clockwise on the base until it locks. Ensure the bowl’s locking tabs align with the mixer’s base. This prevents wobbling during mixing.
Can I Adjust The Mixer For Different Attachment Types?
Yes, release the attachment hub cover and insert the desired attachment. Secure it by tightening the hub knob. This allows you to switch between tools like beaters and dough hooks.
Conclusion
Adjusting your KitchenAid stand mixerPrivacy Policy is simple and quick. Check the alignment and tighten any loose parts carefully. Proper adjustment ensures better performance and longer mixer life. Keep your mixer clean and well-maintained for best results. Small steps can make a big difference in your baking.
Enjoy smoother mixing and consistent dough every time. Now, you are ready to use your mixer with confidence. Happy baking!


