


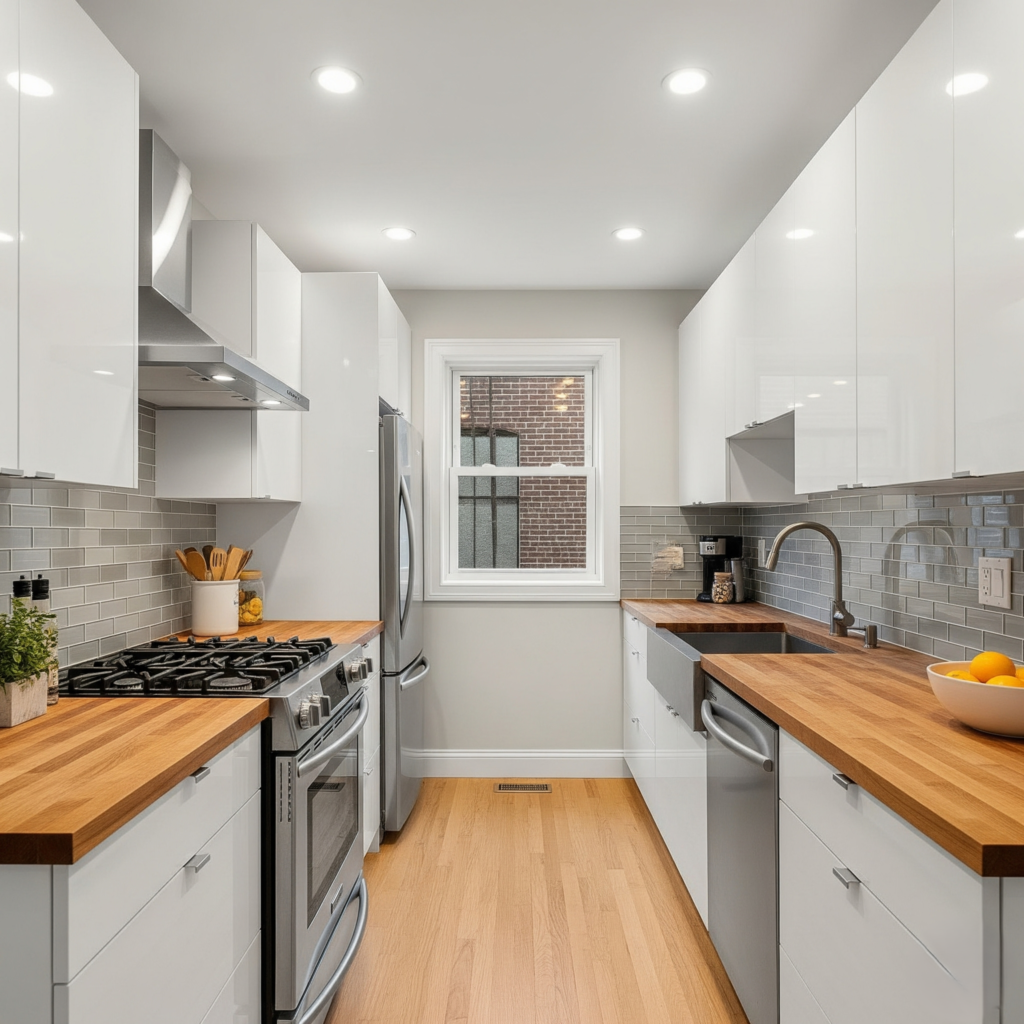
Are you planning to brighten up your kitchen with pot lights but unsure where to start? Getting the layout just right can completely transform your space, making it feel more open, welcoming, and functional.
But how do you decide where to place each light so every corner shines perfectly? In this guide, you’ll discover simple, practical steps to design a pot light layout that fits your kitchen’s size and style. Keep reading, and you’ll soon have a clear plan that brings both beauty and brightness to your heart of the home.
Credit: umbrellageneralsolutions.com
Choosing Pot Light Types
Choosing the right pot light types shapes the kitchen’s look and feel. The right lights improve visibility and mood. Different types suit different kitchen styles and needs. Understanding the main options helps in making smart choices. Consider the style, brightness, and energy use for each type.
Recessed Vs. Surface-mounted
Recessed lights sit flush with the ceiling, giving a clean look. They save space and spread light evenly. Surface-mounted lights hang below the ceiling and add style. They are easier to install in kitchens with low ceilings. Each type fits different kitchen shapes and ceiling heights.
Selecting Bulb Types
Pot lights use various bulbs like LED, halogen, or CFL. LEDs last longer and give bright, clear light. Halogen bulbs offer warm light but use more energy. CFL bulbs are energy-saving but contain small amounts of mercury. Pick bulbs that suit your kitchen’s color and brightness needs.
Energy Efficiency Options
Choose energy-saving bulbs to cut electricity bills. LED pot lights consume less power and stay cool. Look for ENERGY STAR-rated bulbs for quality and savings. Dimmable lights give control over brightness and save more energy. Smart lighting systems add convenience and reduce waste.
Planning Your Kitchen Lighting
Planning your kitchen lighting sets the foundation for a well-lit and functional space. It’s not just about placing lights randomly on the ceiling; it’s about understanding your kitchen’s unique needs and how lighting can enhance both style and usability. Taking time to plan ensures you avoid dark spots and harsh shadows while highlighting the areas you use most.
Assessing Kitchen Size And Shape
Start by measuring your kitchen’s length and width. A larger kitchen usually needs more pot lights to cover the space evenly, while smaller kitchens require fewer but strategically placed fixtures.
Think about the kitchen layout—whether it’s galley, L-shaped, or open concept. Different shapes affect how light spreads and where shadows fall. For example, an L-shaped kitchen might need extra lighting near corners to avoid dark areas.
Identifying Task And Ambient Areas
Break your kitchen into zones based on activities. Task areas like countertops, sinks, and cooking zones need brighter, focused light. Ambient lighting fills the entire room with soft, general light.
Ask yourself where you perform detailed tasks, such as chopping or reading recipes. Position pot lights directly over these spots for clear visibility without glare. You might also consider dimmable lights to adjust brightness between cooking and casual dining.
Considering Ceiling Height
Ceiling height changes how light disperses. Higher ceilings require stronger or more pot lights to ensure sufficient brightness at counter level. If your ceiling is low, fewer lights with wider beam angles might work better.
Have you noticed how a high ceiling can sometimes make a room feel dim despite many lights? Adjust your layout accordingly to avoid wasted energy and uneven lighting. The right balance keeps your kitchen bright and inviting, no matter the height.
Spacing And Placement Guidelines
Designing the layout of pot lights in your kitchen requires careful planning. Proper spacing and placement enhance functionality and aesthetics. They help illuminate the kitchen effectively. Let’s explore the best practices for positioning pot lights.
Calculating Distance Between Lights
Maintain equal distance between each pot light. This ensures even lighting throughout the kitchen. Typically, space them 4 to 6 feet apart. Consider ceiling height when determining spacing. Lower ceilings may require closer spacing. This avoids dark spots.
Aligning With Kitchen Zones
Divide the kitchen into zones. Focus on areas like countertops, islands, and sinks. Place pot lights directly above these zones. This highlights work areas and enhances visibility. Use task lighting for detailed kitchen tasks.
Avoiding Shadows And Glare
Position pot lights strategically to prevent shadows. Avoid placing them directly behind where you stand. This minimizes shadows on work surfaces. Ensure lights do not create glare. Consider dimmers to adjust light intensity.
Layering Light For Function And Style
Layering light in your kitchen adds both function and style. It creates a balanced atmosphere that helps with tasks and enhances the room’s look. Pot lights provide general illumination, but layering different types of light improves visibility and mood.
Combining different light sources gives depth and highlights key areas. This approach makes the kitchen feel warm and inviting while keeping it practical for cooking and cleaning.
Combining Pot Lights With Accent Lighting
Pot lights offer bright, even light across the kitchen ceiling. Pair them with accent lighting to highlight features like artwork or textured walls. Accent lights add visual interest and break the flat look of pot lights alone.
Use small spotlights or LED strips to draw attention to shelves or decorative items. This layering creates a cozy and stylish atmosphere, making your kitchen more dynamic.
Integrating Under-cabinet Lights
Under-cabinet lights brighten countertops where most kitchen work happens. They reduce shadows cast by overhead pot lights, improving safety and visibility.
Install LED strips or puck lights under cabinets for focused task lighting. These lights also add a soft glow when main lights are off, perfect for nighttime ambiance.
Using Dimmer Controls
Dimmer controls adjust the brightness of pot lights and other fixtures. They let you create the right mood for different times and activities.
Lower light levels for relaxing or dining, and increase brightness for cooking. Dimmers improve energy efficiency and extend bulb life by using less power.
Installation Tips And Safety
Proper installation and safety are key to a successful pot light setup in your kitchen. Careful planning helps avoid costly mistakes and hazards. Follow practical tips to ensure your lights shine bright and last long.
Marking And Measuring Placement
Start by marking where each pot light will go. Measure distances from walls and between fixtures evenly. Keep at least 12 to 24 inches from cabinets to avoid shadows. Use a pencil and tape measure for accuracy. Mark spots on the ceiling clearly before cutting holes.
Electrical Considerations
Check the kitchen’s electrical capacity before installing pot lights. Each fixture adds load to the circuit. Use proper wiring and follow local electrical codes strictly. Turn off power at the breaker panel to avoid shocks. Use insulated tools and wear safety gloves. Avoid overloading circuits to prevent fire risks.
Hiring Professionals Vs. Diy
Decide if you want to hire an electrician or do it yourself. Professionals ensure safe, code-compliant installation. They handle wiring and permits efficiently. DIY saves money but requires basic electrical skills. Study instructions carefully and use the right tools. Know your limits to avoid accidents or damage.

Credit: www.reddit.com
Maintenance And Upgrades
Maintaining your kitchen pot lights ensures they stay bright and functional, while upgrades can enhance convenience and energy efficiency. Regular care prevents unexpected failures and keeps your kitchen looking sharp. Let’s look at how simple actions can extend the life of your lighting and improve your kitchen experience.
Cleaning And Bulb Replacement
Dust and grease can quickly dull pot lights, especially in a busy kitchen. Clean the fixtures regularly using a soft, dry cloth or a gentle cleaner suitable for light fixtures. Avoid harsh chemicals that might damage the trim or bulb.
When a bulb burns out, replacing it promptly restores your kitchen’s brightness. Always turn off the power before changing bulbs to stay safe. Keep spare bulbs handy—LED bulbs are a great choice for longer life and lower energy use.
Upgrading To Smart Lighting
Smart lighting adds control and customization to your kitchen setup. You can adjust brightness, change colors, or set schedules right from your phone or voice assistant. Have you considered how much easier it would be to dim the lights for a cozy dinner or brighten them for cooking?
Upgrading is often as simple as swapping out old bulbs for smart ones or installing smart switches. These upgrades can save energy and add convenience without rewiring your entire kitchen. Plus, many smart systems integrate with home automation, adding future-proof value.
Troubleshooting Common Issues
If your pot lights flicker or won’t turn on, the problem might be a loose bulb, faulty switch, or wiring issue. Start by checking the bulb and tightening it if needed. If the issue persists, test the switch or circuit breaker next.
Sometimes, dimmer switches don’t work well with certain LED bulbs, causing flickering or buzzing sounds. Replacing the dimmer with one compatible with LEDs usually fixes this. If you’re unsure, consulting an electrician can save time and avoid safety risks.
Credit: www.youtube.com
Frequently Asked Questions
How Many Pot Lights Do I Need In A Kitchen?
The number depends on kitchen size and ceiling height. Generally, space pot lights 4-6 feet apart for even lighting. Use more lights for larger kitchens or higher ceilings to ensure proper brightness.
What Is The Best Spacing For Pot Lights In Kitchens?
Ideal spacing is about 4 to 6 feet between lights. This prevents shadows and provides uniform illumination. Adjust spacing based on ceiling height and kitchen layout for optimal light distribution.
Where Should Pot Lights Be Placed In The Kitchen?
Place pot lights over work areas like countertops, sinks, and islands. Avoid placing them too close to walls to reduce shadows. Position lights evenly to enhance kitchen functionality and aesthetics.
Can I Use Dimmable Pot Lights In My Kitchen?
Yes, dimmable pot lights offer flexible lighting options. They allow you to adjust brightness for cooking or ambiance. Ensure compatible dimmer switches are installed for smooth control.
Conclusion
Proper pot light placement brightens your kitchen and improves tasks. Plan spacing carefully to avoid dark spots and glare. Use layers of light for a warm, inviting space. Remember to consider your kitchen’s size and shape. The right layout makes cooking and cleaning easier.
Experiment with different designs before installation. Good lighting changes how your kitchen feels and works. Start with these tips to create a bright, functional kitchen today.


