


Are you ready to give your kitchen cabinets a stunning upgrade? Cutting crown molding might sound tricky, but with the right steps, you can do it yourself and achieve professional-looking results.
Imagine the satisfaction of seeing perfectly fitted molding that adds style and value to your kitchen. In this guide, you’ll learn exactly how to cut crown molding for your cabinets without the usual confusion. Stick with me, and by the end, you’ll feel confident tackling this project on your own.
Let’s get started!
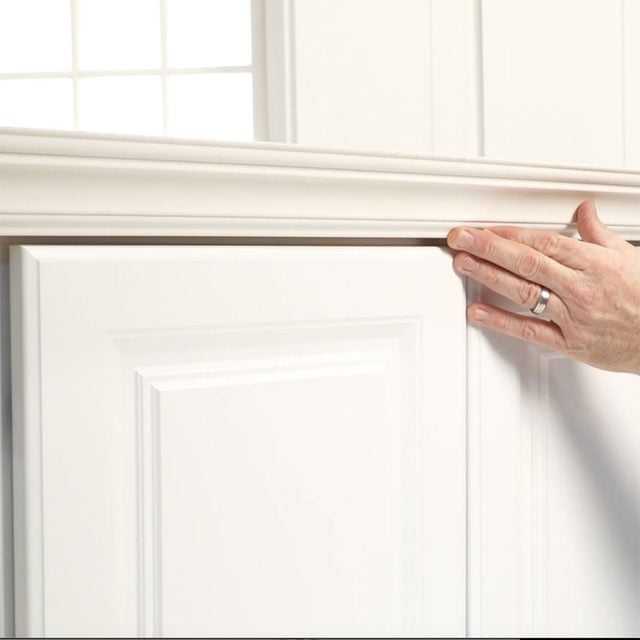
Credit: www.familyhandyman.com
Tools Needed
Cutting crown molding for kitchen cabinets requires the right set of tools. Having proper tools makes the job easier and ensures clean, precise cuts. Use tools designed for woodworking and measuring to achieve the best results.
Essential Cutting Tools
- Miter saw – for accurate angled cuts
- Hand saw – for small adjustments and fine cuts
- Coping saw – to fit corners perfectly
- Sandpaper or sanding block – smooth edges after cutting
- Clamps – hold molding steady while cutting
Measuring Instruments
- Tape measure – measure lengths precisely
- Combination square – check angles and straight lines
- Protractor or angle finder – measure complex angles
- Pencil – mark cut lines clearly on molding
Safety Gear
- Safety glasses – protect eyes from dust and splinters
- Ear protection – reduce noise from power tools
- Dust mask – avoid inhaling sawdust
- Work gloves – protect hands from cuts and splinters

Credit: www.thisoldhouse.com
Choosing Crown Molding
Choosing the right crown molding for your kitchen cabinets sets the foundation for a polished and cohesive look. It’s not just about picking a pretty design; the type, material, and style must work together with your cabinetry and overall kitchen theme. Making a thoughtful choice here can save you time and frustration later during installation.
Types Of Molding
There are several types of crown molding, each giving a different visual effect. You can go for traditional profiles like ogee or cove, which add elegance and curves to your cabinets. If you prefer a cleaner look, simple straight or stepped moldings work well.
Consider how much detail you want. More intricate patterns draw attention, while minimalist styles blend in smoothly. Which type will highlight your cabinets without overpowering the space?
Material Selection
Crown molding comes in wood, MDF, polyurethane, and even PVC. Wood offers a classic feel and can be stained or painted, but it might be pricier and needs more care. MDF is budget-friendly and easy to paint, but it’s not moisture resistant.
If your kitchen tends to get humid, polyurethane or PVC moldings resist warping and are lightweight. Think about your kitchen’s environment and how much maintenance you’re willing to do. Have you checked how each material reacts to heat and moisture?
Style Matching
Your crown molding should complement the style of your cabinets and the overall kitchen décor. For example, ornate molding suits traditional or farmhouse kitchens, while sleek, simple profiles fit modern or minimalist designs. Matching the molding style can unify the space.
Look closely at your cabinet details—do they have raised panels, beadboard, or flat surfaces? Your molding choice should echo these details for a harmonious look. Ask yourself if the molding enhances your cabinets or competes with them for attention.
Measuring For Cuts
Measure the length of each cabinet edge carefully before cutting. Mark the molding precisely to ensure clean, accurate cuts for a perfect fit.
Measuring for cuts is crucial when cutting crown molding for kitchen cabinets. Accurate measurements ensure a perfect fit and a professional look. This section will guide you through the process step by step.Measuring Cabinet Dimensions
Begin by measuring the length of each cabinet side. Use a tape measure for precision. Write down the measurements on a notepad. Measure from the corner to the edge for accuracy.Marking Cut Lines
Once you have your measurements, transfer them to the molding. Use a pencil for marking. Draw clear lines where the cuts will be. Double-check these lines before cutting. This prevents mistakes and wasted materials.Accounting For Angles
Crown molding often requires angled cuts. Use a protractor to measure the angle accurately. Most crown moldings use a 45-degree angle. Ensure your saw is set to the correct angle. This ensures a snug fit against the cabinets.Cutting Techniques
Cutting crown molding for kitchen cabinets demands precision and a clear understanding of different cutting techniques. Each type of cut serves a specific purpose depending on the molding’s placement. Mastering these cuts will help you achieve clean, professional-looking corners and edges.
Inside Corner Cuts
Inside corners are where two walls meet at an angle, usually 90 degrees, creating a concave joint. To cut molding for inside corners, you need to tilt your miter saw blade at 45 degrees but in opposite directions for each piece. This allows the molding to fit snugly without gaps.
Tip: Always make a test cut on scrap molding to confirm the angle before cutting your final pieces. Have you noticed how even small angle errors can cause big fitting problems? Taking time to measure and adjust will save you from redoing cuts.
Outside Corner Cuts
Outside corners are convex, where the molding wraps around a protruding corner. These cuts also use a 45-degree angle but flipped outward instead of inward. The goal is to create a seamless joint that visually wraps the corner.
Using a coping saw after the initial cut can help refine the fit, especially if your walls aren’t perfectly square. Do you have walls that aren’t quite 90 degrees? Adjust your angle slightly to match the actual corner for a better fit.
Straight Cuts
Straight cuts are necessary for molding pieces that end in a flat surface or don’t meet at a corner. These cuts are simple and done with the saw blade perpendicular to the molding. Ensure the molding is firmly held to avoid splintering.
Don’t rush straight cuts. Even though they seem easy, a clean straight edge is vital for tight joints and professional appearance. Have you checked your saw’s blade sharpness lately? A dull blade can ruin the finish and cause uneven cuts.
Using A Miter Saw
Cutting crown molding for kitchen cabinets requires careful measurement and precise angle cuts. A miter saw helps achieve clean edges by adjusting the blade to match molding angles. This tool ensures perfect fits for corners and smooth installation.
Using a miter saw to cut crown molding for kitchen cabinets can be both thrilling and intimidating. It offers precision that hand tools simply can’t match. This power tool enables you to create clean, sharp angles essential for a seamless finish. But how do you ensure perfection with each cut?Adjusting Angles
Before you begin, set your miter saw to the correct angle. Crown molding typically requires a 45-degree angle for inside corners. Double-check your settings to avoid mistakes. It’s crucial to understand the molding’s orientation. Place it upside down and backwards against the fence of the saw. This technique mimics how it will rest against the wall and cabinet, ensuring accuracy.Making Precise Cuts
Precision is key. Measure twice, cut once—it’s age-old advice because it works. Secure the molding firmly against the fence to keep it steady. Use a pencil to mark where the blade will cut. Cut slowly to maintain control and avoid splintering. A steady hand ensures a smoother finish.Common Mistakes To Avoid
Avoid cutting too quickly. Hastiness can lead to jagged edges and wasted material. Always check that the saw blade is sharp. A dull blade can ruin your project. Never assume the angle is set correctly from a previous cut. Double-check every time to ensure consistency. Remember, patience and precision are your best friends in this process. Taking the time to understand the intricacies of your miter saw can make all the difference. Have you ever experienced a moment where a simple adjustment transformed your project? Embrace the learning curve, and soon, cutting crown molding will feel like second nature.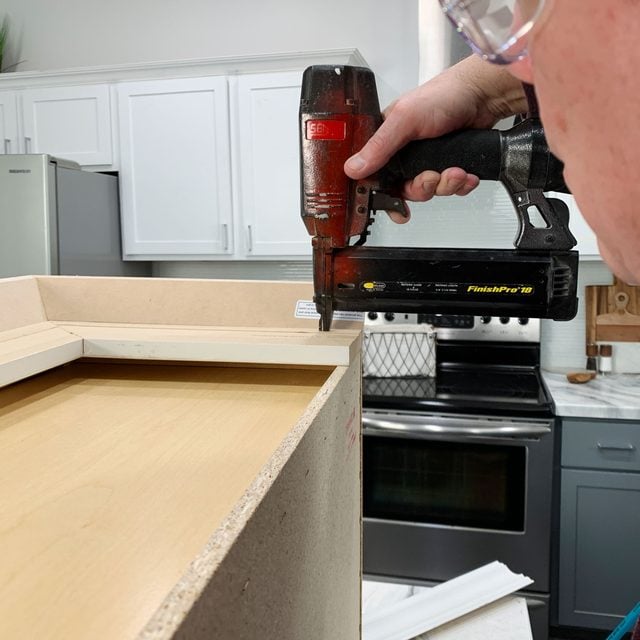
Credit: www.familyhandyman.com
Dry Fitting Pieces
Dry fitting crown molding pieces is a crucial step before final installation. It helps ensure each piece aligns perfectly and fits the space without gaps. This process saves time and prevents costly mistakes later.
During dry fitting, you place the molding pieces in their intended positions without glue or nails. This allows easy adjustments and checks for accuracy. Pay attention to corners and joints for a seamless look.
Aligning Moldings
Start by placing the crown molding pieces against the kitchen cabinet edges. Hold them tightly to check how well the angles meet. The molding should sit flush without forcing or bending. Proper alignment creates a neat, professional finish.
Checking Fit And Gaps
Look closely at all joints and corners. Small gaps can weaken the appearance. Use a flashlight to spot shadows or spaces. Even tiny gaps can be visible after painting. Identifying these early helps you fix them before final attachment.
Making Adjustments
If pieces don’t fit perfectly, mark the areas that need trimming or sanding. Use a fine saw or sanding block to adjust angles and edges. Test fit again after each change. Repeat this until all pieces fit snugly with no gaps.
Finishing Touches
Finishing touches bring your crown molding installation to life. They ensure a smooth, clean look that blends perfectly with your kitchen cabinets. Taking time on these details improves the overall appearance and durability. Here are key steps to complete your project with confidence.
Sanding Edges
Sanding softens rough cuts on the molding edges. Use fine-grit sandpaper for a smooth finish. Sand lightly to avoid damaging the molding shape. Focus on corners where cuts meet to blend seams. Wipe off dust with a clean cloth after sanding.
Filling Gaps
Small gaps often appear where molding pieces join or meet the wall. Use wood filler or caulk to fill these spaces. Apply with a putty knife and smooth out excess filler. Let it dry completely before sanding for a seamless look. This step hides imperfections and prevents drafts.
Painting And Staining
Choose paint or stain that matches your kitchen décor. Apply thin, even coats to avoid drips and streaks. Use a brush for detailed areas and a roller for flat surfaces. Allow each coat to dry fully before adding another. Proper finishing protects the molding and enhances beauty.
Installation Tips
Installing crown molding on kitchen cabinets needs care and precision. Proper installation ensures the molding looks neat and stays in place for years. Use the right tools and techniques to avoid gaps and damage. Here are some key tips to help with the installation process.
Securing Moldings
Hold the molding firmly against the cabinet edge. Use a level to keep it straight. Nail the molding into the cabinet frame, not just the surface. Choose nails that are long enough to hold well but not too long to damage the cabinet. Space nails evenly, about every 12 inches. Check alignment often during installation.
Using Adhesives And Nails
Apply a thin line of wood glue or construction adhesive on the back of the molding. This adds extra hold and reduces movement. Use a nail gun to insert finishing nails for a clean look. Countersink nails slightly below the surface for easy filling. Clean any excess glue quickly with a damp cloth. Wait for the adhesive to dry before painting or staining.
Avoiding Damage
Protect cabinets by placing painter’s tape where molding meets the surface. Avoid hammering directly on the molding edges to prevent splitting. Use a nail set to drive nails below the wood surface gently. Handle moldings carefully to stop dents or scratches. Sand any rough edges before installation for a smooth fit.
Frequently Asked Questions
How Do You Measure Crown Molding For Kitchen Cabinets?
Measure the length and height of your cabinets carefully. Use a tape measure for accuracy. Mark measurements on molding before cutting.
What Tools Are Needed To Cut Crown Molding Precisely?
You need a miter saw, measuring tape, pencil, and safety glasses. A protractor helps for angle adjustments. These tools ensure clean, accurate cuts.
How Do You Cut Inside Corners Of Crown Molding?
Set your miter saw at 45 degrees for inside corners. Cut the molding upside down for precise angles. Test fit pieces before final installation.
Can I Cut Crown Molding Without A Miter Saw?
Yes, use a coping saw and miter box. It’s slower but effective for small projects. Ensure precise angle marking before cutting.
Conclusion
Cutting crown molding for kitchen cabinets takes patience and care. Measure each piece twice before cutting. Use a miter saw for clean, accurate cuts. Practice on scrap wood to build confidence. Take your time to fit pieces snugly. A good fit makes your kitchen look polished.
With simple steps, you can achieve great results. Enjoy the process and your beautiful kitchen upgrade.


